
E7 | Essex County Colonial | What's Old Is New Again
Season 48 Episode 7 | 23m 42sVideo has Closed Captions
Kevin and Zack restore a 130-year-old clawfoot tub and custom kitchen cabinets go in.
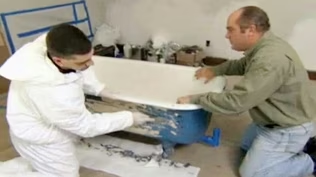
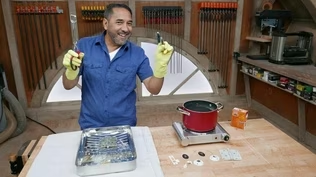
Kevin O'Connor checks in on Zack Dettmore and tile setter Gary Moreland who adjust the primary bath layout for a vintage look. Zack and Kevin strip and refinish the home's original cast iron clawfoot tub, master cabinetmaker Kevin Fassnacht scribes an inset cabinet panel to the uneven tile floor, and Zack and Mike Dull use a slow cooker to strip paint from the original brass door hardware.
Problems playing video? | Closed Captioning Feedback
Problems playing video? | Closed Captioning Feedback
Funding for THIS OLD HOUSE is provided by The Home Depot and Renewal By Andersen.
Support provided by:


E7 | Essex County Colonial | What's Old Is New Again
Season 48 Episode 7 | 23m 42sVideo has Closed Captions
Kevin O'Connor checks in on Zack Dettmore and tile setter Gary Moreland who adjust the primary bath layout for a vintage look. Zack and Kevin strip and refinish the home's original cast iron clawfoot tub, master cabinetmaker Kevin Fassnacht scribes an inset cabinet panel to the uneven tile floor, and Zack and Mike Dull use a slow cooker to strip paint from the original brass door hardware.
Problems playing video? | Closed Captioning Feedback
Where to Watch This Old House
This Old House is available to stream on pbs.org and the PBS app.
Keep Exploring

This Old House Insider Newsletter
Get This Old House exclusive stories, tips, and behind-the-scenes information delivered right to your inbox every month.Providing Support for PBS.org
Learn Moreabout PBS online sponsorshipKevin O.: Today on "This Old House"... We are taking on a very complicated tile job here in the primary shower.
Zack: And we'll show you how to make this 130-year-old tub look brand-new.
And we'll install custom kitchen cabinetry that fits seamlessly with every angle of the walls and floors.
♪ Man: Ahh.
That's it.
♪ ♪ ♪ ♪ Kevin O.: Hey, there.
I'm Kevin O'Connor.
And welcome back to "This Old House" and to our project here in Essex County, New Jersey, where we're working on this 1893 Dutch Colonial Revival.
Now, since the last time we were here, the old back deck has come down completely.
You can see remnants of it right here.
It ran all the length of the house over to there.
That is gone, and it's gonna be replaced with a smaller deck in this area here.
So from the old kitchen door, you will come down a few steps to the deck, which will come over here, and then a step or two down off of this onto what's gonna be probably a new bluestone patio right here in this area.
That is gonna change the use back here and the direction of traffic, because now this is gonna be the primary entry into the back of the house.
And it's gonna land you in what was the old half bathroom that used to be right here and is now gonna be the new mudroom.
Harley and Ethan requested a mudroom.
Two young kids.
Primary entrance from the back.
So that's gonna be a hardworking room.
It's gonna take you out into what is the new family room.
And you can see lots of progress in here.
So all of the wallboard is up on the walls, as well as the sloped ceiling.
Two new skylights make it a nice, bright room.
And underneath the floor protection, you can see over here our new Southern yellow pine flooring in here.
That's 2 1/2 inches.
Now, you may recall that these were milled specifically for our project.
There's a local mill nearby, and they took these big beams out of an old factory.
And they've been turned into flooring here all throughout the first floor, as well as upstairs.
That old half bath is now a half bath right here with the entrance around the corner.
A couple steps takes you up into the new kitchen, which was always in this part of the house.
But as you can see, everything in here is new.
Cabinet guys are setting our new cabinets -- beautiful white oak face frames.
And the basic layout is, we'll have a fridge in this corner, cabinets, stove, more cabinets wrapping around here.
And then over by the windows, Ethan is gonna be building a built-in banquette for seating.
So the floors in here are not wood.
These are being protected.
But you can see right here they are actually handmade clay hexagon tiles.
Nice look.
And also a good floor for the kitchen.
Speaking of tile, Zach is actually upstairs right now in the new primary bath working on a different tile project.
♪ Zack...back in the primary bathroom.
Good to see you.
Oh, Gary.
Good to see you again, too.
Gary: Hey, Kevin.
Kevin O.: Been a while.
All right.
So, Zack, you and Charlie did a lot of framing, and you went to great lengths.
And correct me if I'm wrong here -- You sort of adjusted dimensions so that you would end up with no cuts to your tiles.
All fulls or all halves, right?
Zack: Correct.
[ Kevin M. and Zack laugh ] Kevin O.: How did you do?
Zack: Well, here, we did quite well.
Full tile.
Half tile.
Full tile.
Half tile.
However, on this back wall, we decided to maximize the shower size.
Kevin O.: Yeah.
Zack: So we made the shower larger than it would have been if we had shrunk it to the exact grout line.
Kevin O.: Right.
Zack: So that means at the back of the shower, it's not exactly a perfect layout, but we felt like it was more worth it for the homeowner to have a larger shower.
Kevin O.: Yeah.
So, Gary, what'd you do for us?
Gary: To maintain our grout line center, we added an inch and 1/8 here and took an inch and 1/8 off of this one.
Kevin O.: Okay.
So instead of a perfect half, in some cases, you've got one that's a little bigger or one that's a little smaller.
Gary: Right.
Kevin O.: Nice.
And, Zack, the reason you went through this whole exercise is because you were trying to go for that vintage tile look, right?
Zack: Exactly.
We wanted this to look and feel like a bathroom that had been here for 130 years, and it's already beginning to look that way.
Kevin O.: Yeah.
Okay.
Well, we'll see what it looks like when it's done, but I think you're making good headway here.
Zack: All right.
I got a little project I need to work on relating to the kids' bathroom out back.
You want to come and find me when you guys are done?
Kevin O.: Sure.
Absolutely.
Zack: All right.
See you in a bit.
Kevin O.: All right, Gary.
You and me.
What are we doing?
Gary: So, to mirror this side, we're gonna put up a few more courses on this wall.
Kevin O.: How long you been using the spacers?
Gary: Uh, probably about 15 years now.
They are a game changer.
Kevin O.: Yeah.
I mean, to think that these guys did it by eye.
Gary: I know.
Okay.
So because I want a staircase, our next cut here is our cove.
Kevin O.: So every inside cove starts with a full tile?
Gary: That's right.
It's up to us to make the cut.
[ Saw whirring ] Kevin O.: Oh, I like your saw right there.
That's a nice cut, huh?
So is that what you're looking for?
Gary: Not quite.
And you see how that has those little chips there?
Kevin O.: Just tiny ones, but... Gary: Once you grout that, you'll see every bit of that chip.
Kevin O.: Ah.
Gary: So we want to sand that down.
Kevin O.: Okay.
Gary: I use my 60-grit sanding pad... and just do like so.
Kevin O.: Oh, that's it, huh?
Gary: That's it.
Kevin O.: Oh, yeah.
You're right.That is it.
That looks good.
All right.
So more cuts to be made or what?
Gary: Yeah, a couple more.
But speaking of cuts, I had to cut all the sanitary cove base down and I'll show you why.
So our sanitary cove came with a 3/8-inch lip.
Kevin O.: So this is the piece that sits in the bottom right there.
Gary: Right.
Kevin O.: This is 3/8.
Okay.
Gary: But our floor tile is only 1/8 thick.
Kevin O.: So let's say this is the inside of our shower pan.
Gary: Right.
Kevin O.: So this tile is hitting the floor there.
Ah.
Gary: It's too much of a lip.
Kevin O.: You're gonna see that exposed lip the entire way.
So you took -- Let me see that.
Gary: Sure.
Kevin O.: So you had to cut off the bottom basically half inch, quarter inch of all these?
Gary: Right.
Kevin O.: Okay, let's see how we did with your cut piece.
Oh, that's nice.
Look at that.
Just a perfect lineup on that sweep.
Gary: Right.
Better look and easier to clean.
Kevin O.: Well, I got to give you guys credit.
The attention to detail is phenomenal.
I love it.
Okay.
So you're gonna continue putting wall tile up?
Gary: Yep.
I'll finish this wall up.
Kevin O.: Always a pleasure, Gary.
Thank you.
Gary: Thanks, Kev.
♪ Kevin O.: Zack, I was not surprised to see an old cast-iron tub in the house when we originally toured it.
I am surprised to hear that Harley and Ethan want to save it 'cause most people don't.
Zack: Yeah, well, I mean, why not save it?
This is original to the house, and we can actually tell that by doing a quick Internet search.
We saw it said "SMC."
And we can see the size of it -- 5 1/2.
And it's manufactured in Pittsburgh.
Kevin O.: Beautiful.
Zack: So why not keep it?
All we have to do is really just get this surface paint off the bottom of it so we have a nice bond for new paint.
Kevin O.: So what is the process for getting all of this off and bringing her back to life?
Zack: So this could potentially be lead-based paint.
We don't know.
So we don't want to sand it or scrape it.
So what we're gonna do is apply a stripper that goes over the top, and then there's kraft paper that goes on that to keep it from evaporating.
We leave it for, like, 24 hours, and we should be able to just strip all of this away very easily.
Kevin O.: All right.
I'm maybe check back in and see the progress throughout.
And if you're gonna do any cooking, you're dressed appropriately.
[ Zack laughs ] All right, I'll check back.
Zack: All right.
See you.
Use a respirator 'cause this is a corrosive product.
I don't want to get it on my face at all.
Now I'm just gonna pop these legs off, put them on top, and then I'm gonna start just globbing this stuff onto it.
So this paste, we're gonna try and spread about 1/4 inch thick over anywhere there's paint.
So you don't need to be too careful about it.
Just get it nice and covering the whole tub.
♪ ♪ So now I'm applying this kraft paper, which is gonna keep it from evaporating so that it can continue to work for the next 24 hours on the paint.
♪ ♪ Okay.
Now we've got our little feet.
Work that in as best we can.
♪ So once again, we're keeping this wrapped up so it stays moist and continues to work for the next 24 hours.
All right.
There we go.
Hopefully all that paint will be released and then we can easily strip off the paint tomorrow.
♪ All right.
We got 24 hours of this cooking.
Hopefully it comes off nice and easy.
Kevin O.: So I'm all suited up.
What's your, like, protocol in terms of PPE, and how do you want to handle this?
Zack: Yeah.
So, I mean, because everything's wet, we don't need to worry about dust so much.
But basically what we want to do is just contain this, put it in the garbage bag.
Then we will seal the garbage bag and dispose of it properly.
And then we'll start scraping away.
Kevin O.: Treating everything as if we're in a lead situation.
Zack: Exactly.
Yeah, as long as you're lubricating the bristles, that's all that matters.
Kevin O.: So, Zack, what do you think?
Zack: This looks great.
Right down to the bare metal.
That's exactly what we want to see.
Kevin O.: Okay.
And then, of course, we still have the whole other side with cleaning up that enamel.
Zack: Yeah, and that's actually gonna be a lot of elbow grease.
Kevin O.: All right.
Well, it's a good start.
Zack: All right.
Thanks for the help.
♪ Man: Yeah.
Zack: So this is my favorite time of the job.
The kitchen cabinets are on-site.
And master cabinetmaker Kevin Fassnacht is here.
And he not only built these cabinets, but he's here installing them.
What's up, Kevin?
Kevin F.: What's up, Zack?
How you doing, man?
Good to see you.
Zack: This looks great.
Kevin F.: Yeah, man.
Come a long way.
Zack: So I gotta say, you were the first call I made when I got this job... Kevin F.: Yeah.
Zack: ...because I was a little stressed about the homeowner being a cabinetmaker.
Picking the right person to make all the kitchen cabinetry... Kevin F.: For sure.
Zack: ...is a little stressful.
Kevin F.: Yeah.
And honestly, it's a little intimidating, knowing that he knows what he's looking at, so... But I think we're the right people for the job\ 'cause we're really proud of what we do.
Zack: Yeah.
So I noticed a couple things here.
This looks like inset cabinetry.
I've got a frame mounted on a plywood carcass.
Kevin F.: Mm-hmm.
Zack: Up here, though, it looks like overlay cabinetry 'cause I just see this plywood exposed.
What's going on here?
Kevin F.: That is right.
So the main focus of this home is a historic home.
So we want to go with inset, which is very true to that era.
Zack: Right.
Kevin F. So the biggest difference between frameless and inset is, frameless is where you have a 3/4-inch plywood box, where the door overlays... Zack: Right.
Kevin F.: ...that plywood.
Now, inset is exactly how it sounds -- where the door is inset from the solid wood frame of the cabinetry.
Zack: Got it.
So it's sitting inside this area?
Kevin F.: Correct.
Zack: So basically this inset cabinet -- You're making the frame in your shop.
Kevin F.: Yep.
Zack: This inset cabinet -- You're making it here in the field.
Kevin F.: Yes.
Zack: So is there, like, one specific cut on this job that's kind of got you a little freaked out?
Kevin F.: Yes.
Yeah.
So, this is actually the panel that we're working with right here.
So this is the full-depth panel that runs all the way back into the wall here.
The scribe to the wall is very important first.
So we set it to where it needs to be.
And then we scribe it to the floor, to the undulations of the tile.
Zack: Right.
So that's like, the wall is an easier scribe.
So you get that one out of the way.
And the floor is a harder one, and so you do that one second.
Kevin F.: Drop down.
Right.
Zack: You'll just drop down.
Got it.
Well, can I help you with it?
Kevin F.: Of course.
All right.
So what we're doing here is, we're applying tape to the stile that we're gonna be scribing.
Zack: All right, let's get it over there.
Kevin F.: Sweet.
All right.
So I'm gonna grab the laser.
The laser is really important here to make sure this panel is dead level.
So I'm gonna find a point on the floor arbitrarily... and get my vertical.
And what I'm looking -- trying to do here is trying to split this laser line.
So I want to be able to see the laser on the wood itself and on my finger.
Zack: I see it up there.
It's on the edge and it's on my finger.
Kevin F.: Cool.
Perfect.
Now what we do is, we double-check with a level.
And we are perfect.
Zack: Wow.
Kevin F.: All right, so the next thing that we're gonna be doing here is, we're gonna be setting the distance in which we are scribing off of this panel.
So I want to set this cabinet to be level to my laser line, 'cause it must have got shifted overnight.
So... as long as I bring that back up, we'll do the same concept as before by splitting that laser line from the top to the bottom to be where I want to be.
Now, the purpose of this -- I want to make sure I have the same measurement and that we know that we are perfectly parallel with each other.
Zack: Got it.
Kevin F.: So now that it's all nice, level, and plumb, we're gonna be taking off the distance in which it carries from this edge to the interior of the box.
So I use these mag shims.
So they're 1/8-inch increments.
Magnetic shims that stack together which can determine the exact amount that I want to be taking off.
Looks like 1/8 short.
One more.
Zack: I like how that kind of removes a little bit of human error.
Kevin F.: Exactly.
So it does all the math for me.
All right.
So we're gonna create a nice, hard line to cut against.
So, in theory, when we remove this tape... we'll have a hard-cut line of what we're gonna be actually scribing to.
Zack: So we're ready to cut.
Kevin F.: We are.
Zack: All right.
Kevin F.: Let's do it.
Let's go out.
All right, so the first thing we're gonna do is, we're gonna use our track saw.
The majority of what we're doing here is removing off of most of that material so then we can hone in with our power plane, hand plane, or belt sander.
So now I'm gonna switch to my power plane.
The power plane is a nice aggressive way to kind of creep up into that line.
So now since we just took off most of the material with the power plane, I'm gonna use my little handy-dandy hand plane here so you get a nice, crispy, clean scribe line.
Zack: All right.
Let's see how we did.
Kevin F.: Oh, yeah.
Zack: How's it look?
Kevin F.: Looks perfect.
Aligned exactly where we wanted on both edges here.
Zack: All right, so time for the bottom?
Kevin F.: Oh, yeah.
Zack: All right.
I'm excited.
Kevin F.: What I'm gonna use here, I'm gonna use a compass.
There's two different compasses.
They're the exact same one.
What I did with this one, I threw a hook at the end of this so it can drop into the grout lines... Zack: Right.
Kevin F.: ...and really trace exactly what we need to do because it's very inconsistent.
Zack: It is.
Kevin F.: All right.
I think we're good.
Similar process as before.
We're gonna start with the track saw.
And then we're gonna work to the belt sander, angle grinder, and a combination of things to really hone in to this tile.
Zack: Okay.
Up.
All right.
All right.
Kevin F.: Slide it over.
Great success.
I think everything jibed out exactly where it needed to be.
Zack: Well done.
Well, I gotta say, uh, Ethan and Harley, especially Ethan, are really gonna appreciate you going the extra mile, because that's clean and these white oak cabinets are beautiful.
Well done.
Kevin F.: Absolutely, man.
Appreciate it.
♪ ♪ Zack: So one of the things we love about this house is all the original character.
We've got the doors, the hardware, and the hinges.
But the unfortunate thing is, they're all coated in paint.
So it's been Michael's job to sort of bring this stuff back to life.
How's it coming?
Michael: Oh, it's going pretty good.
We have a couple of these already cleaned up, but we have these in the pot cooking right now.
We stuck all the door hardware in this slow cooker and filled it with just water and let it soak overnight.
Zack: Did you put anything in there aside from water?
Michael: No.
Just water.
Zack: That's great.
We've been doing a lot of this lately.
It's been working pretty well.
All right, let's check it out, Mike.
Michael: All right.
So, first, we're gonna pull out this full mortise lock.
You can see the paint is already trying to peel off.
Zack: Yeah.
Michael: And you got to work a little quick so the paint doesn't dry on there.
Zack: Right.
'Cause it comes off easier when it's hot.
Michael: And what was really cool that we found out -- These are solid brass.
Zack: That's right.
100% metal.
Not a bit of plastic in that.
That's pretty cool.
All right, Mike.
So you want to finish stripping all the paint off this stuff?
And I'll work on redoing these doorknobs.
Michael: I can do that.
So, Mike, it's nice -- At least they didn't paint the wooden doorknobs.
There is about 130 years of hand grease and oil.
Luckily, I've got the lazy man's approach, and I'll just shove them in the, uh, angle drill here and just spin it like it's a lathe.
Michael: Oh, yeah.
Can you imagine doing that all by hand?
Zack: Oh.
No way.
All right.
I'm gonna do a pad to finish it off.
Although that soup looks delicious, let's go ahead and not make any more meals in there.
Oh, that looks like it's pretty easy, Mike.
Michael: Oh, yeah.
Nothing.
Zack: You got it -- Oh, look at that!
Michael: Sometimes we get lucky.
Zack: Guess which one I worked on, Mike.
Michael: It's hard to tell, but I think it's that one.
Zack: I think it is, yeah.
Michael: All right.
I think I'm all out of pieces.
Zack: Nice.
Well done.
Michael: Oh, thanks.
I think they came out pretty good.
What do you think?
Zack: Yeah.
I think so.
I mean, let me text Ethan, see if he wants us to take it a step further and buff them, or if that's good enough.
♪ Kevin O.: Zack, the clawfoot tub project continues.
Zack: It does.
Yeah.
So since you saw it, we let it dry, put a couple coats of primer on, sanded the outside, and brought it up here out of the rain so we can work on the inside.
Kevin O.: Okay.
Zack: So we're going to try and refinish or buff this tub to remove some of those surface scratches and basically make it so it's easier to clean and it looks maybe not good as new, but way better than it looks now.
Kevin O.: So what is the buffing process for an old -- 100-plus-year-old enamel tub?
Zack: So, first, you have to understand what you're dealing with here.
So there's sort of a hardness scale, right?
You got aluminum down around a copper -- like, 2 or 3 on that scale.
And you've got diamonds up at a 10.
Kevin O.: Ah.
Zack: And this is sort of akin to glass, which is about a 6.
So we're gonna use a polish that's formulated for glass to sort of -- You know, imagine if you had a scratch in your windshield.
Something you would use to buff that scratch out -- That's what we're gonna use on this.
And we're gonna try and just do that over the whole area to really restore some of this and remove some of those surface scratches.
Kevin O.: This will be my first rebuffing.
So I'll help you and I'm curious to see how it turns out.
Zack: This is the component we're gonna use.
So I'm gonna take a little bit of that... Kevin O.: Cerium oxide.
Zack: ...and put it right on there.
Kevin O.: All right.
Zack: And then what we want to do is, we want to develop a paste.
So I'm gonna add some water to this pad.
I want it saturated.
Right?
And then we'll bring it.
And we'll add powder and water as needed.
And we're gonna start slow.
So to me, this looks a little too wet, Kevin.
I want to see a little bit more paste.
So I'll add a little bit more there.
That's sort of what I'm looking for.
Seeing those lines.
Kevin O.: Thick enough that it's not running down the side.
Zack: Yep.
Kevin O.: Thin enough that it's not bunching up.
Zack: Exactly.
Kevin O.: I'll make mine.
And you tell me how I do with the consistency.
Zack: You focus on the bottom.
I'll focus on the top.
Kevin O.: Roger that.
♪ It's nice that you can get away with just a pair of gloves and some eye protection.
No fumes, no nasty, toxic paint.
Zack: Yeah, it's a great DIY project.
And you really can't mess it up.
If you make it too shiny, you just dull it back down again.
♪ You can wipe a couple spots.
You think you got it enough or... Kevin O.: Guess we'll only know if we wipe.
How are you feeling?
Zack: I think that's about as good as we're gonna get it.
It looks like we got a nice shine on there, so let's rinse it out and see how we did.
Kevin O.: Okay, Zack, how do you feel about that?
Zack: I love it.
It's got a nice shine to it.
It doesn't look dirty anymore and I think it's perfect.
So now we just got to flip it over, roll some paint on it, and call it a day.
Kevin O.: All right.
I'll help you flip it.
Zack: Okay.
So now, Kevin, I'm just gonna give it a quick once-over with some sandpaper, knock off anything that was high.
And that's it.
Ready for paint.
♪ So I think Ethan and Harley picked this color 'cause they've got the nice black and white tile.
So this is gonna tie in really nicely.
Kevin O.: Mm-hmm.
Black-and-white tub.
Gloss finish for the final coat?
Zack: This is gonna be, like, a matte finish.
Kevin O.: Matte?
Okay.
Zack: Just to sort of not punch out too much.
And it won't highlight some of the pitting that is present on this tub.
♪ Kevin O.: All right, Zack.
I like it.
136 years later, it's looking pretty good.
Zack: I think it's ready for another 130 years.
Kevin O.: Let's hope so.
Okay.
So what do we got coming up next time?
Zack: Next time, we'll be doing trim carpentry.
And believe it or not, we'll probably still be putting the tile in that bathroom up there.
Kevin M: Perfection takes time.
Zack: It does.
You can't rush it.
Kevin O.: All right.
Well, until then, I'm Kevin O'Connor.
Zack: I'm Zack Dettmore.
Kevin O.: "This Old House" down here in Essex County, New Jersey.
Kevin O.: Next time on "This Old House"... our homeowner, Ethan, is a professional woodworker.
This is his shop.
But he's also using it to work with kids -- to teach them woodworking skills and to have an impact on the community.
Then we'll show you how to take vintage subway tile to a whole new level.
Zack: I'm obsessed with it.
[ Both laugh ] Check out this masterpiece.
This was a headache and a half.
Kevin O.: That's next time.


- Home and How To

Hit the road in a classic car for a tour through Great Britain with two antiques experts.

 New Episode
 New Episode









Support for PBS provided by:
Funding for THIS OLD HOUSE is provided by The Home Depot and Renewal By Andersen.